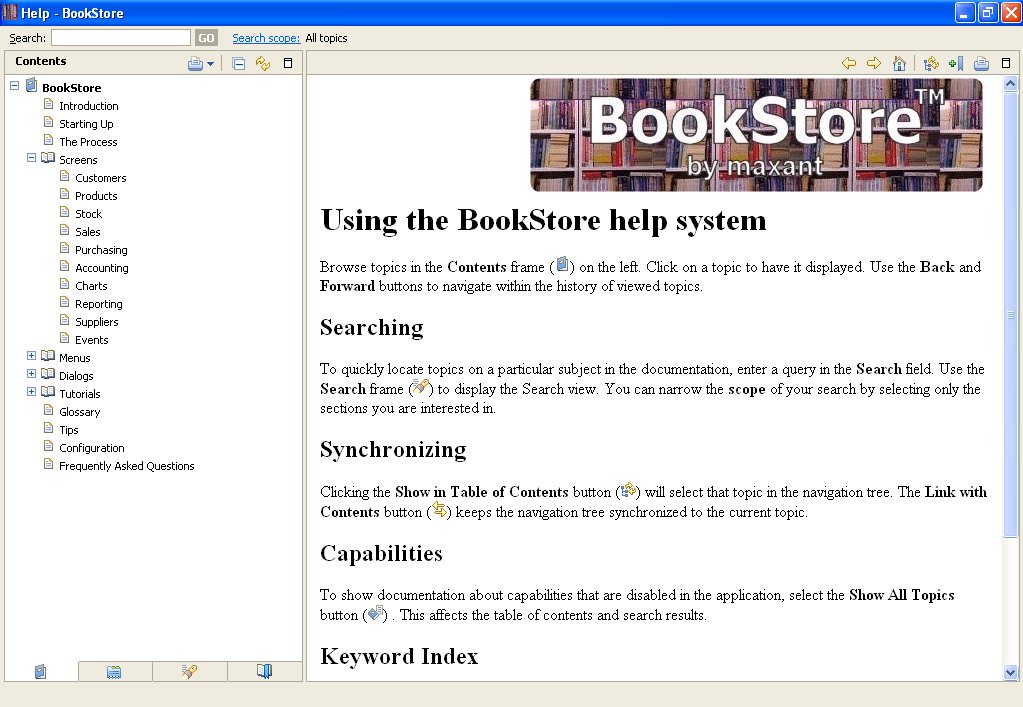
Eclipse offers plugin authors the ability to add Eclipse Help to their plugins. Opening that help will give a nice window with searchable help, something like this (click on the image to see it in full size):
The following blog entry shows how to integrate help into an RCP application (or indeed a plugin or feature).
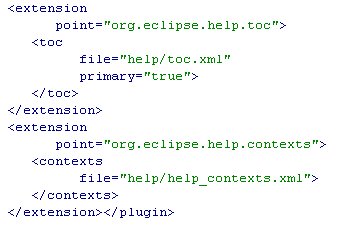
The first thing you need to do, is to extend your plugin.xml to tell your plugin that you want to have help. In the source view of your plugin.xml include the following extension points:
To go with these entries, you now need to add the help folder to your plugin project:
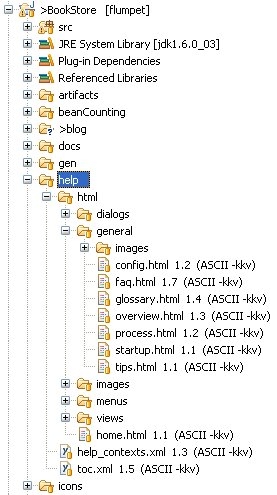
The html folder under the help folder contains simple HTML documents for each page of help that you want to write. The toc.xml file is the table of contents which defines what appears in the left pane of the help system when it is opened. The help_contexts.xml file contains mappings from “context names” to files which are relevant for that context. Contexts are used when opening context sensitive help, for example when pushing the F1 button.
An example of the toc.xml follows:
An example of the help_contexts.xml follows:
Now before the help system will work, we need to do a few more things, namely:
- Add dependencies
- Add a help menu
- Add context hooks
To add dependencies, you can open the .product file for your application (to export your plugin as an RCP application, you need to add a .product file). Open its configuration tab and click on the “Add Required Plug-ins” button. This should then add a list of all plugins upon which your plugin is dependent.
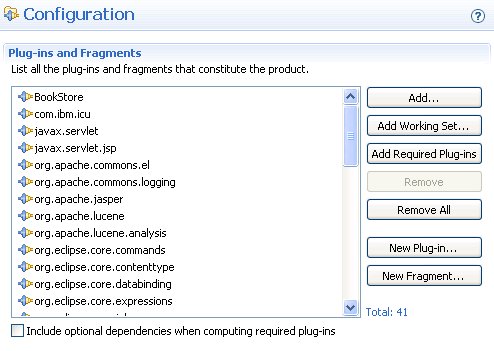
If this did not work, the following is a list of all the plugins which the BookStore plugin is dependent upon (if you open the .product file in the text editor, you can edit XML directly):
To add a help menu, edit your ApplicationActionBarAdvisor class. First add a help action as a class member variable:
private IWorkbenchAction helpAction;
Next, in the makeActions method, add the following code to register the action:
        helpAction = ActionFactory.HELP_CONTENTS.create(window);
        register(helpAction);
Finally, in the fillMenuBar method, add the following bits of code:
        MenuManager helpMenu = new MenuManager(
                "&Help",
                IWorkbenchActionConstants.M_HELP);
        .
        .
        .
        menuBar.add(helpMenu);
        .
        .
        .
        helpMenu.add(helpAction);
This will add a help menu to the main window of the application.
The last thing we need to do before the help system will work as an extra window within our application (Workbench Mode), is to add the context sensitive hooks. On any graphical component where the F1 key is pressed, the Eclipse workbench will look for a parent that has context sensitive help setup. If it finds such a parent, it will activate the help.
To enable context help for an item, add the following bit of code (here, for adding context specific help to a view):
        PlatformUI.getWorkbench().getHelpSystem().
                          setHelp(parent,"BookStore.CustomersView");
Note that the String has the prefix “BookStore.”, but in the context XML above, the context IDs do not contain this prefix! The prefix is one of several things, I’m not really sure which! It could be the Application Name, the Plugin Name, or the TOC Label in the toc.xml file. It could even be the Topic which is somehow set for the help system. It’s best to refer to the documentation for more details here.
Right, now that is all done, it is time to run your application and try out the F1 key and the new help menu.
Notice how the first page which the help shows is a standard Eclipse help page? Wouldn’t it be great if it could be customised? Well, it can!
You simply need to add a line to your plugin_customization.ini file (this file can be added to applications in order to customize things like their default accelerator keys) like this:
org.eclipse.help.base/help_home=/BookStore/help/html/home.html
In the above line, the new home page for the help needs to be located under help/html/home.html within your project. The name “/BookStore” which appears above, before the actual path to the file is this magical application or plugin name, discussed above.
All of the above work was done in Eclipse 3.3.0, although it should also work for Eclipse 3.2 as well as Eclipse 3.4 and later.